 Polycase is a U.S. manufacturer of plastic enclosures for electronics. Since display mounting is a hot topic with our customers, we decided to test-drive Polycase's customization service to see what it would take to mount a 2x16 LCD or OLED in a sturdy ABS case. (We've previously reported on other mounting solutions.)
Thursday, December 6, 2012
Test Driving Polycase's Customization Service
Polycase is a U.S. manufacturer of plastic enclosures for electronics. Since display mounting is a hot topic with our customers, we decided to test-drive Polycase's customization service to see what it would take to mount a 2x16 LCD or OLED in a sturdy ABS case. (We've previously reported on other mounting solutions.)Saturday, November 24, 2012
Using AVRISP mkII with Arduino
 Using Arduino's built-in serial bootloader to upload and run programs is convenient, but a dedicated programming device like the AVRISP mkII can:
- Program blank (bootloaderless) AVR chips.
- Reduce the time required to upload sketches to the Arduino.
- Save the program memory required by the bootloader.
- Let you program minimal-hardware -inos without a USB/serial adapter.
- Eliminate the issues involved with sharing a UART between the bootloader and a peripheral (such as our serial displays).
This note will offer a few hints and tips for getting started with the AVRISP mkII with Arduino, since this is different from using it with Atmel's development software.
Tuesday, November 13, 2012
Cutouts for LCD/OLED Mounting--Hot Knife vs Razor Saw (Updated)
Update: This note originally covered only the popular hot-knife method for hand-making display cutouts, but we recently tried again with an 8-dollar Zona Saw. Won't keep you in suspense: The razor-sharp saw cuts plastic faster and better than the hot knife. Details here.
The cheapest, simplest One tool for making a display cutout in plastic is a hot knife, like the Weller SP23LHPK soldering kit, which comes with an adapter to attach Xacto-type blades.
Using this tool to cut openings in ABS speedy boxes (like this Wisher H2851 we used) requires some technique to overcome the limitations of the crude tool. We experimented, cutting dozens of holes in several boxes, in order to fine-tune the procedure. Here's what we found:
Hot Knife Method
Using this tool to cut openings in ABS speedy boxes (like this Wisher H2851 we used) requires some technique to overcome the limitations of the crude tool. We experimented, cutting dozens of holes in several boxes, in order to fine-tune the procedure. Here's what we found:
Friday, November 2, 2012
Test Driving Front Panel Express

The panel is 2mm anodized aluminum (bronze finish) with custom screw holes and cutouts to precisely fit the displays. It cost $41.98 plus $4.95 for ground shipping. It took 7 days from submission of the file to completion of the job. Here's how it went:
Thursday, November 1, 2012
Mounting an LCD or OLED
This is the first in a series of notes on mounting LCDs and OLEDs. This installment will cover the basics; next time we'll walk through the process of using Front Panel Express to design and manufacture a simple LCD/OLED mounting panel.
 Our displays end up in applications ranging from scuba rebreathers to mining gear to car-door testers to (not kidding) bedpan washers. This makes it tough to recommend a one-size-fits-all answer to mounting and enclosure issues. But there are a few constants:
Don't go naked. Displays must be mounted behind a protective, transparent window (examples) to prevent damage from curious fingers, electrostatic discharge, dirt, solvents and moisture. You've seen a lot of projects online that leave the display naked and exposed to the world, but chances are the sole user of those devices is the maker. Other users cannot be expected to be as careful of or kind to a display as the person who bought it (and would have to replace it if it gets broken).
Thursday, October 25, 2012
Two Displays on One Port
A customer's question led to an interesting semicustom modification: A simple, non-networking, no-hardware, no-cost method of addressing two displays from a single serial port. The required firmware modification can be applied to any of the following displays: SGX-120L, GLO-216Y/G, GLO-416Y, BPP-440L.
Not sure that users are clamoring for this capability, but this customer seemed pretty pleased. Contact tech at seetron.com if you have a two-display app and we'll fill you in on the details.
Not sure that users are clamoring for this capability, but this customer seemed pretty pleased. Contact tech at seetron.com if you have a two-display app and we'll fill you in on the details.
Monday, October 22, 2012
Support Software Updates
Minor updates to our most-used utility programs:
- Serial Sender now supports comms 1-99 (previous version only addressed 1-8). If you've got a collection of those USB-serial cables, you have probably noticed that the system keeps incrementing comm port numbers with each different cable you connect (reserving previously assigned numbers for devices you may never use again). As a result it's easy to exceed the traditional single-digit range of comm-port numbers. It will probably take awhile before you hit 99, though.
- Bitmap and configuration utilities for the SGX-120L serial graphics LCD already had support for higher comm-port numbers, but in the process of adding this capability to Serial Sender, we discovered a bug that could prevent the higher-numbered ports from initializing properly. The new versions now available for download have been fixed.

Tuesday, October 16, 2012
Arduino with ILM-216L
Helped a customer interface an ILM-216L to an Arduino--all it required was a tweak to the previous Hello World example for the BPI-216.
Both of these older displays expect inverted serial input, the logic-level equivalent of old-school RS-232. The Arduino's UART, the logical place to connect a serial device, outputs non-inverted serial, so the initial hookup produced gibberish.
The answer is simple: Use the SoftwareSerial library to drive the display via a general-purpose I/O pin, and set the instruction for inverted output via an optional parameter. It's all demonstrated in the previous app note here.
I suggested a change to the clearScreen constant in the example code to match the ILM's instruction set:
It apparently did the trick, because a few minutes this pic arrived by email:

Happy to help!
Both of these older displays expect inverted serial input, the logic-level equivalent of old-school RS-232. The Arduino's UART, the logical place to connect a serial device, outputs non-inverted serial, so the initial hookup produced gibberish.
The answer is simple: Use the SoftwareSerial library to drive the display via a general-purpose I/O pin, and set the instruction for inverted output via an optional parameter. It's all demonstrated in the previous app note here.
I suggested a change to the clearScreen constant in the example code to match the ILM's instruction set:
const char clearScreen[ ] = {12,0};It apparently did the trick, because a few minutes this pic arrived by email:

Happy to help!
Saturday, July 21, 2012
BPP-420L and BPP-440L Upgrades
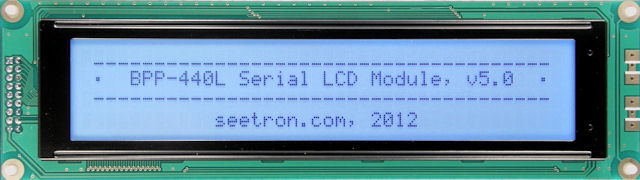
BPP-440L inherited the startup screen mechanism and serial-polarity flexibility of the GLO- series displays, and got a bright, new FSTN LCD. Both redesigned interfaces are now manufactured in Arizona, USA (though the LCDs are still imports). We've been manufacturing in Hong Kong since before the British handed it back, and we love our suppliers there, but there are significant advantages to making at least some products closer to home.
Wednesday, March 7, 2012
Windows Terminal Software Alternative
The posts about Serial Sender have attracted a lot of search hits from folks searching for an alternative to Hyperterminal, so as a public service, I'd like to suggest Termite. I used Termite on a recent in-house project that required two-way serial comms and found it to be a solid program, with enough features to get the job done (configure and open a port, send some stuff, receive some stuff), but without the bloat and bugs of Hyperterminal. Thumbs up.
Friday, February 24, 2012
Cleaner Arduino Coding with Streaming
Arduino
Serial.Print() and Serial.Write() instructions multiply like bunnies in applications that use serial output for debugging or to drive serial displays. If only related instructions, variables and strings could be neatly packaged for serial output using a single instruction...Turns out that they can, and with zero code overhead. All that's required is the Streaming library from Arduiniana.org.Tuesday, February 7, 2012
Arduino ISR Clock Demo
The engineering blog engblaze.com recently posted a great tutorial on using Arduino/AVR timer interrupts. This led to a lunch-hour challenge: To convert their once-a-second LED blinker into a minimal 7-segment-style clock display using our $39 GLO-216G serial OLED. Mission accomplished:
Thursday, January 19, 2012
Custom Character Demo with Serial Sender

<65>. The update allows bytes expressed as hex: <0x41>. Some values, particularly bit patterns, are easier to work with in hex. Coincidentally, a user asked for guidance on defining custom characters for the GLO-216 with Serial Sender, so here it is:Thursday, January 5, 2012
Odometer-effect Counter with Arduino and GLO-216 Serial OLED
Using a custom character in an unusual way, you can create a fun rolling-odometer visual effect with a GLO-type serial OLED. We've posted a sample Arduino program that does the trick. Here's a quick video:
Program listing is after the jump. (It's been tweaked slightly since first publication; now uses PROGMEM to store the digit bitmaps and instructions in program memory, sparing precious Arduino RAM.)
Subscribe to:
Posts (Atom)